Do you want to boost WooCommerce sales with popups?
Optimizing a WooCommerce store for better conversions can be challenging. But, we have got a solution for you. Have you ever thought of using coupon codes as your promotion strategy? If you check most online shopping sites, they will be using coupon codes for promotion, and it works.
Even your competitors might be using them.
If you are interested in it, we have got you covered. This article will show you how you can boost WooCommerce sales by using coupon popups and gaining more revenue.
OptinMonster
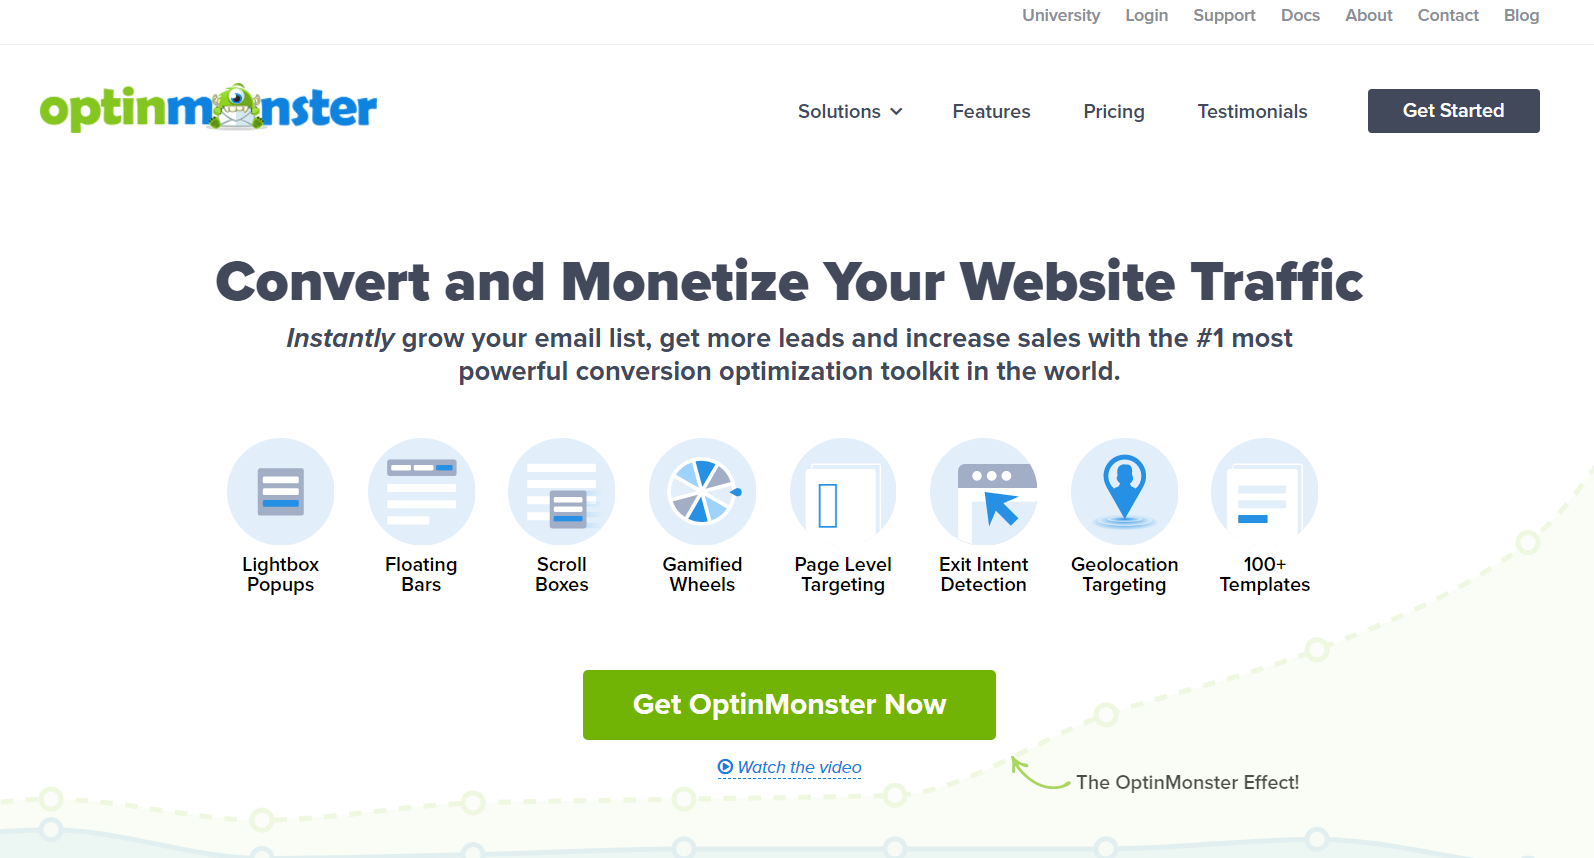
There are so many popup plugins are available for WordPress. But for our users, we will always recommend the best one – OptinMonster. OptinMonster is a premium WordPress lead generation plugin with unique features.
Some of the advanced features of OptinMonster are:
- Exit-Intent
- Geo-Targeting
- MonsterLinks
- Drag and Drop Builder
- Yes/ No Forms
- Countdown Timer
- Content Locker
- Coupon Wheel Optins
- Cookie Retargeting
- Smart Tags
Etc.
We will be using the popup feature for this tutorial.
How To Boost WooCommerce Sales Using OptinMonster?
The first thing you need to do is, get an OptinMonster subscription. If you check the pricing page of OptinMonster, you will see four premium options.
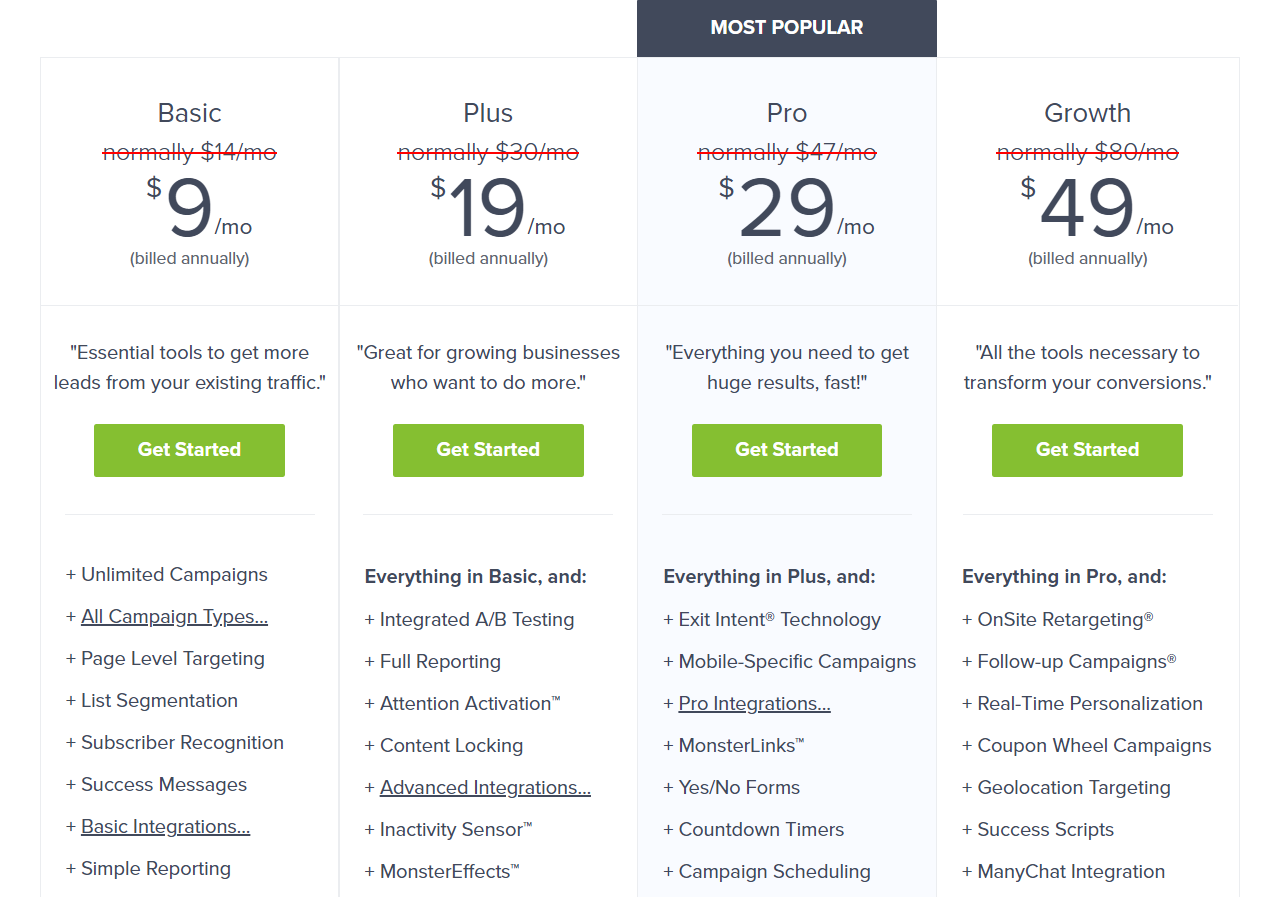
- Basic – $9/ month
- Plus – $19/ month
- Pro – $29/ month
- Growth – $49/ month
Using your Credit Card or PayPal account, you can purchase a plan. And once you have done that, you will get access to their premium features and licensing information.
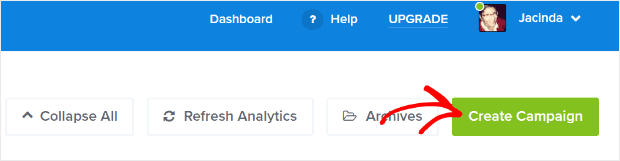
Log in to the OptinMonster account using the credentials. Once you have logged in to the site, click on the Create Campaign button.
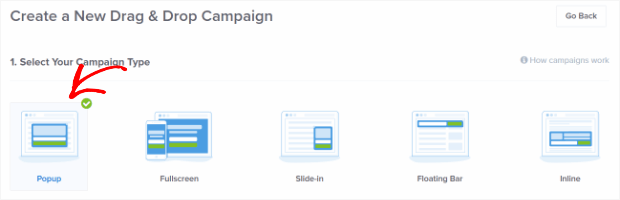
You will need to choose a campaign type now. OptinMonster comes with several campaign types like
- Popup
- Fullscreen
- Slide-In
- Floating Bar
- Inline
For this article, we will go with the Popup template.
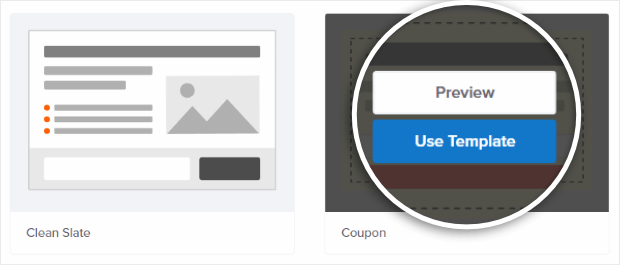
In the next step, you need to choose a template for your popup. Thankfully, OptinMonster comes with several pre-made templates that are ready to use. You can easily import them to your editor and start customizing them. On the other hand, you can create a unique template from scratch. In this case, we will pick the coupon template created by OptinMonster.
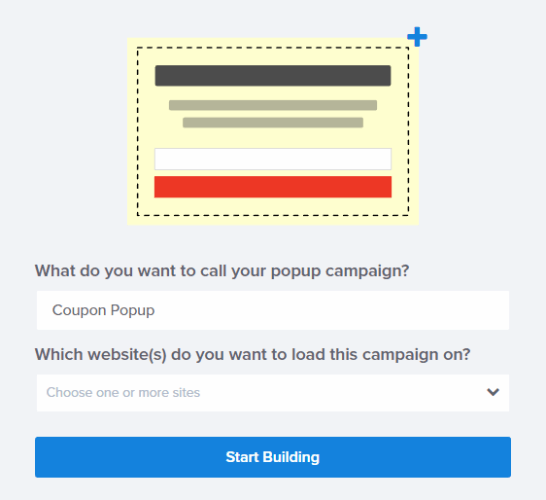
Once you have chosen a template for your popup, name it. Also, select the websites from the dropdown.
You will be redirected to the OptinMonster builder now.
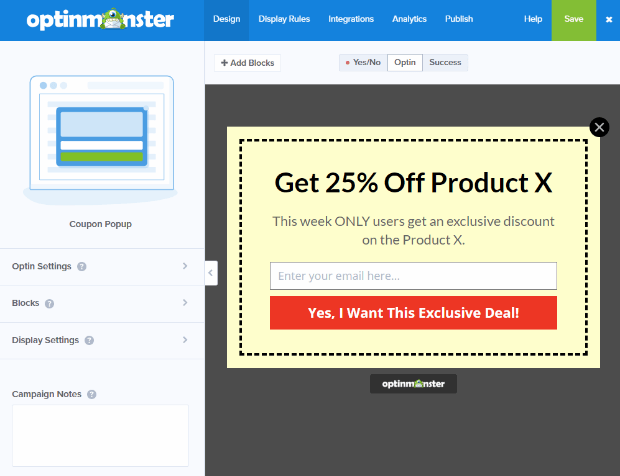
From there, you can customize the popup. When you need to edit an element, you just need to click on it. And in the left sidebar, you will see the options for editing it. For example, let’s try to edit the header.
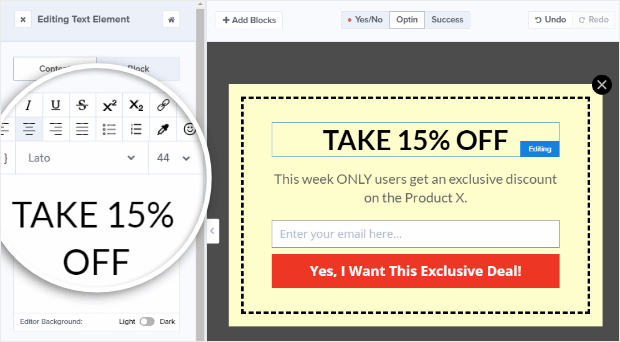
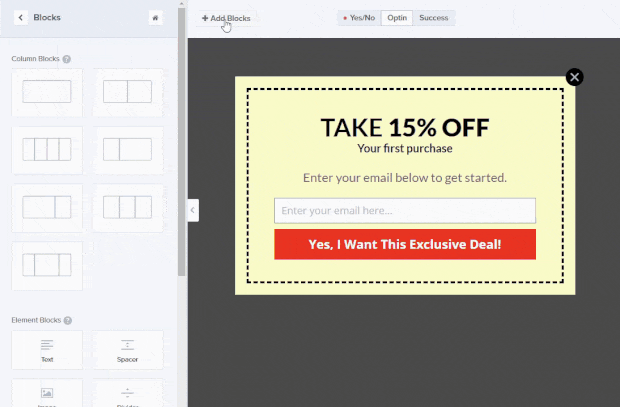
You can customize the header and description according to your requirements. Plus, you can also add an image to your popup. Once you have clicked on the + Add Block link, you can drag the image element, drop it inside the popup.
This way, you can add new images to the popup. You will be able to upload new photos to the popup from your computer. We recommend adding an image relevant to your coupon or deal.
Plus, some folks need t change the background color of the optin. To do this, go to the home menu. From there, go to the design tab.
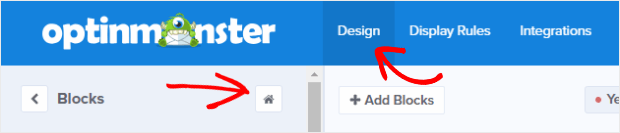
Now, go to the Optin Settings and then Optin View Styles.
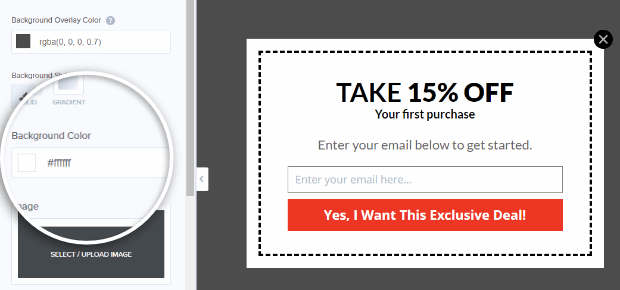
From there, you can modify the background color of the optin. Now, let’s edit the submit button. Click on it, and in the left sidebar, you will see all the available options.
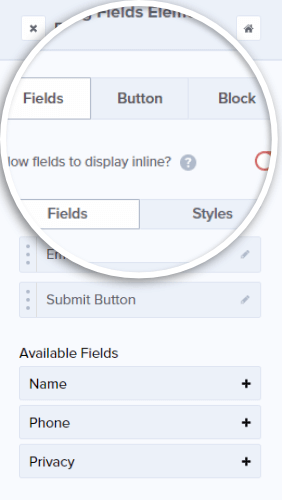
From here, you can edit the fields and the styling options. If you want to modify the button text, select the button option and edit it.
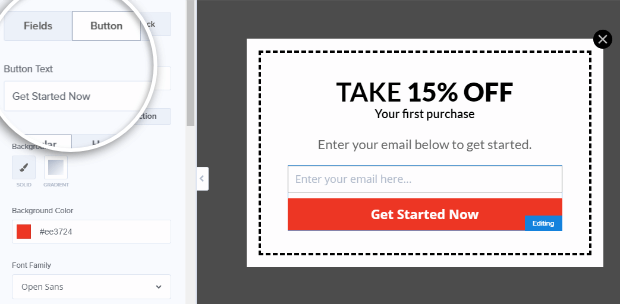
You can also edit the background color and font family of it. Once you have done with your coupon customization, you need to set up the delivery of the coupon. There, you can redirect users to a specific page or show a custom success message. By default, OptinMonster comes with the success view as the action.

On the other hand, you can redirect the users to a custom landing page using the other feature.
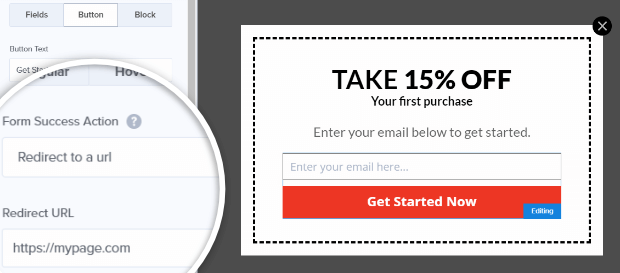
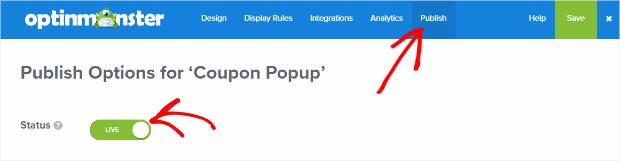
You can use this option to redirect your users to the checkout page. Once you are done with everything, publish the coupon popup.
For embedding it inside your WooCommerce store, you need to install and activate the OptinMonster API WordPress plugin. You will need to connect the plugin with your OptinMonster account so you can access every optins you have created from the dashboard. After enabling the popup on your WooCommerce site, you can see it on the frontend.
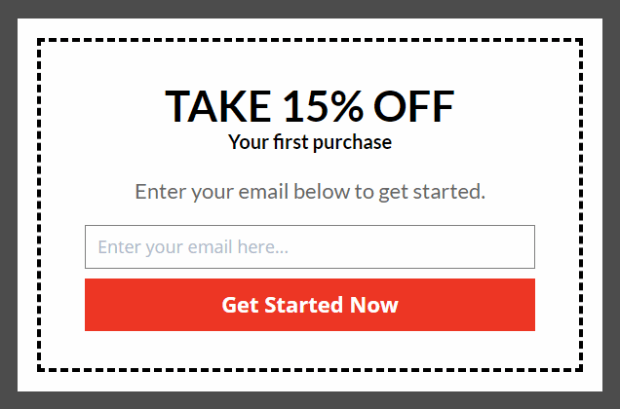
In our case, the coupon popup will look like this:
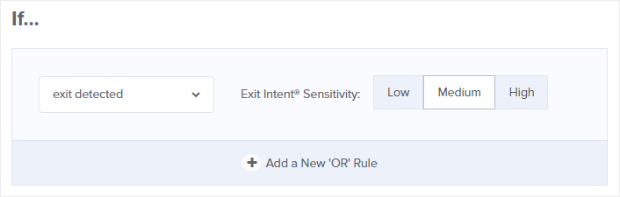
When someone visits the store, the OptinMonster plugin will display the popup. Plus, if you want, you can also configure the display options of your popup optin through the OptinMonster dashboard. From the dashboard, go to the Display Rules section.

We will target the visitors with exit behavior using the custom display rules. So, choose the rule as if exit detected. And you can choose a sensitivity. Medium or High is preferred.
After that, save it. You can also add multiple rules through the display rules section. After configuring it, update the optin. You will see every change in your live optin. You can manually test everything by visiting the website through an incognito tab or another device.
This is how you can boost WooCommerce sales using the OptinMonster WordPress plugin. For most businesses, OptinMonster is something that they need to get more leads and sales.
Get Started With OptinMonster
You can get the premium version of OptinMonster from below.
Have you found this post interesting? If you did, please consider sharing this article with your friends on social media. On top of that, feel free to check out our blog for more WordPress articles.