
Last time, we have shown you how to create an exit-intent popup using the OptinMonster WordPress plugin. You need to test several tactics if you need to increase your email list and return of investment. Well, we do have another OptinMonster tip that will bring you more conversions. In this article, we will show you how to use smart tags inside OptinMonster campaigns and improve conversion rates!
OptinMonster
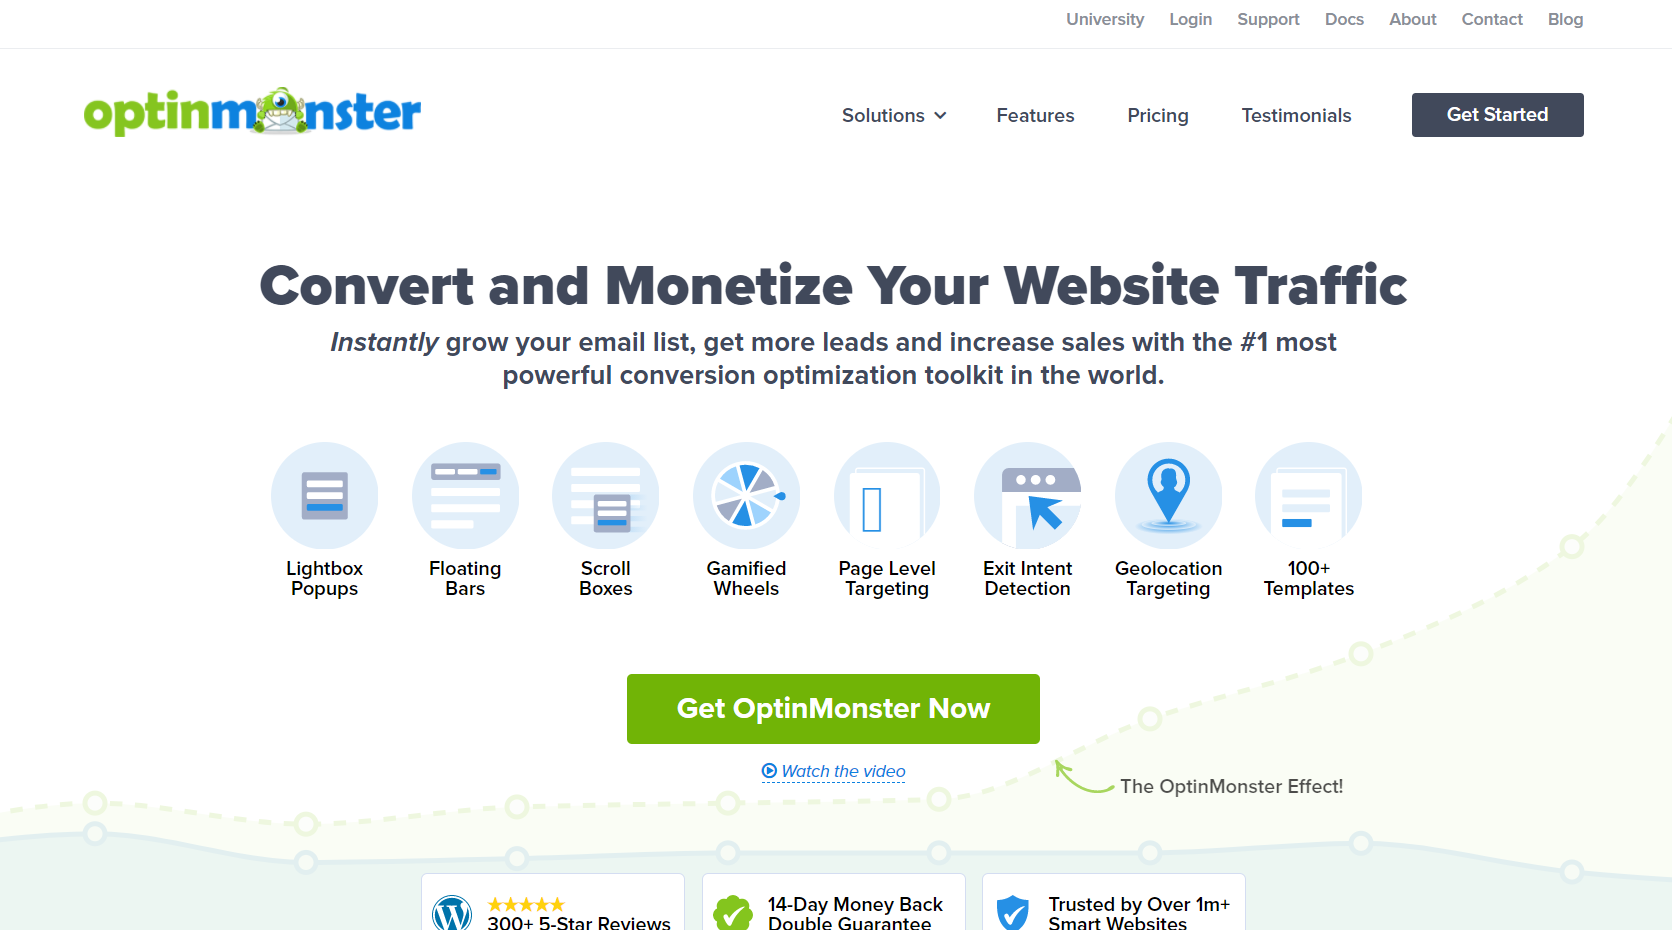
If you want to convert your existing website visitors to loyal email subscribers, you need to try the OptinMonster WordPress plugin. As of today, you can see so many lead generation plugins on the internet. But compared to the competitors, OptinMonster is the best WordPress lead generation plugin you can get in the market.
OptinMonster is developed by the same company behind WPForms, MonsterInsights, SeedProd, WP Mail SMTP, RafflePress, ExactMetrics, etc.
The most popular features of OptinMonster are:
- Drag and Drop Builder
- Yes/ No Forms
- Geo-Targeting
- MonsterLinks
- Scroll Box
- Floating Bar
- Smart Tags
- MonsterEffects
- Exit-Intent
- Countdown Timer
- Coupon Wheel Popups
Etc.
OptinMonster Pricing
OptinMonster comes with four premium pricing options.
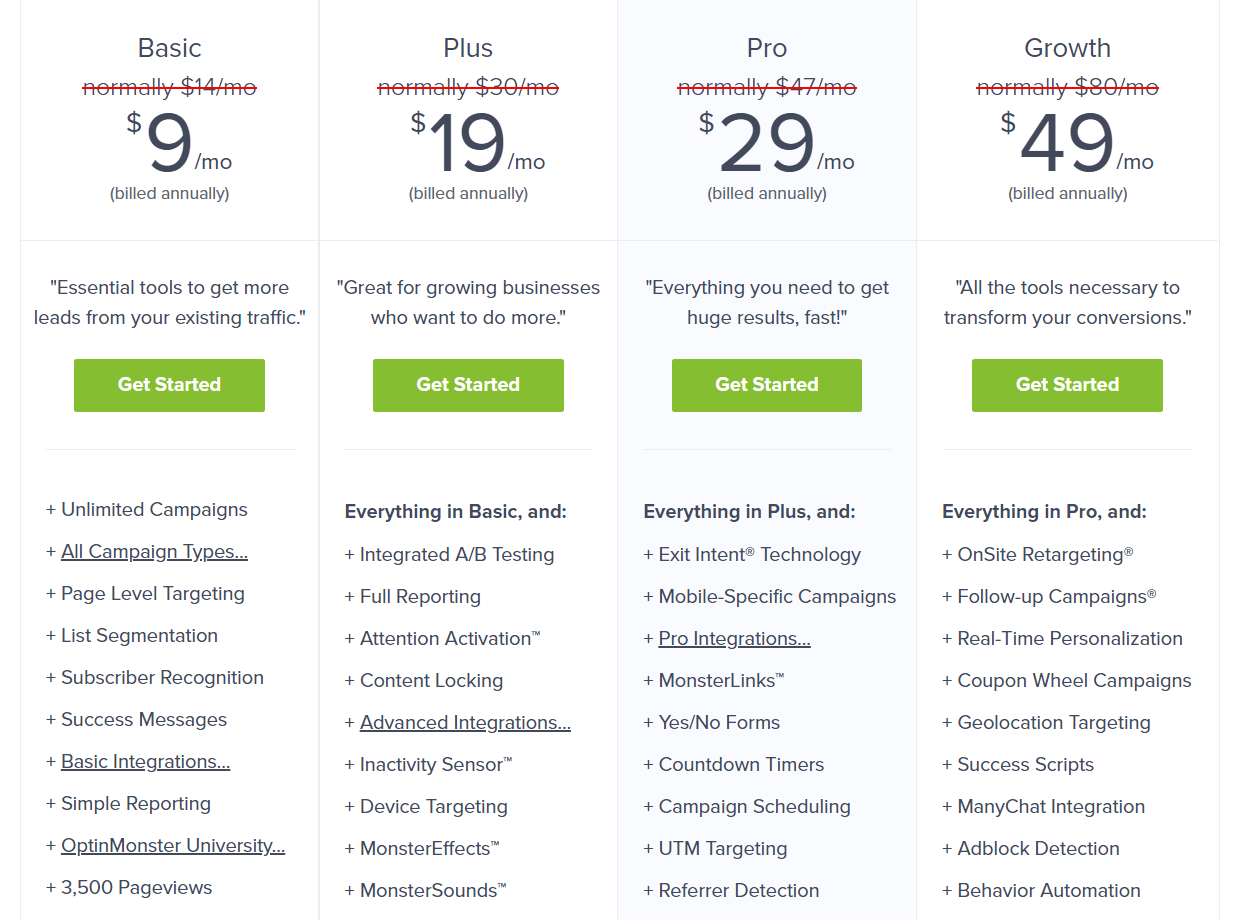
- Basic – $9/ month
- Plus – $19/ month
- Pro – $29/ month
- Growth -$49/ month
With your PayPal account or Credit Card, you can complete the purchase. For using the Smart Tags feature, you might want to purchase the Pro plan or Growth plan.
How To Use Smart Tags Inside OptinMonster Campaigns?
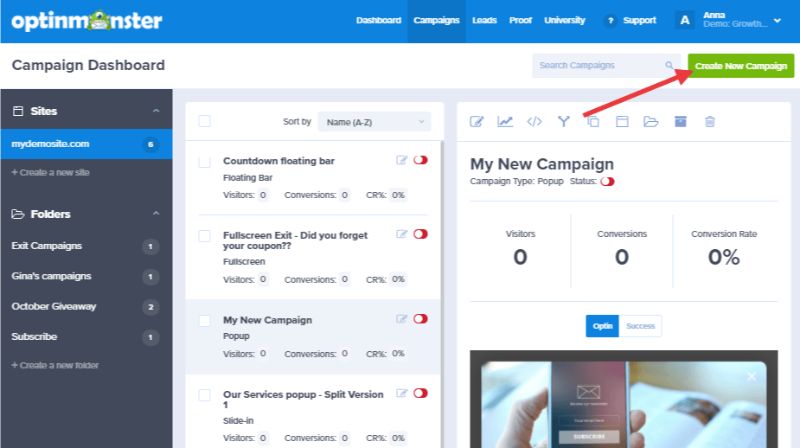
Once you have completed the purchase, you are good to move forward. You will get the login credentials on your registered email. With it, log in to the OptinMonster website.
The very first thing you need to do is, create a new campaign. If you already got one campaign, that’s good. You can edit it and add the smart tags. In this case, we will be creating a new campaign.
On the right-hand side, top, you will see a Create New Campaign button.
Now, you will need to choose the campaign type.
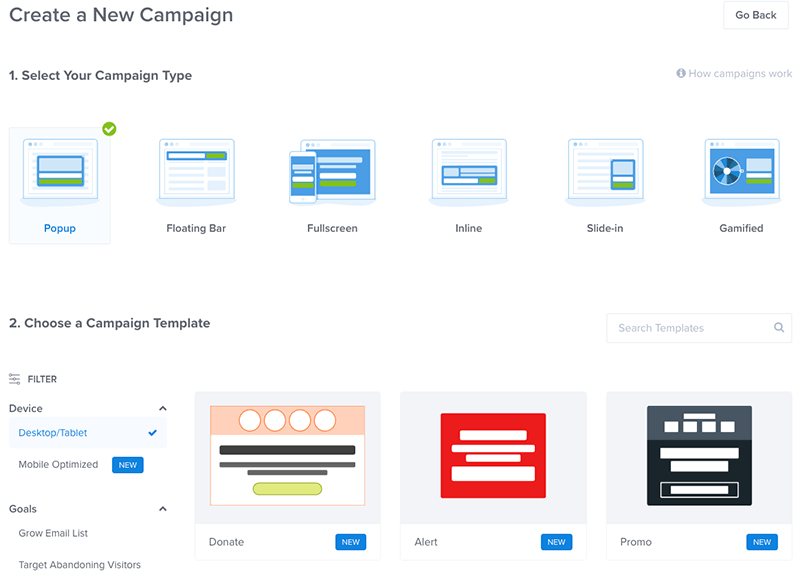
OptinMonster got several campaign types like:
- Popup
- Floating Bar
- Fullscreen
- Inline
- Slide-In
- Gamified
And so on. You need to choose a campaign type from there. In our case, we will always choose the popup campaign type. Once you have selected that, you need to select a campaign template. OptinMonster comes with 50+ pre-made campaign templates.
You can also use the filtering option for finding campaigns. Their mobile-optimized campaigns will help you to target mobile phone visitors. However, you can choose a template according to your use, liking.
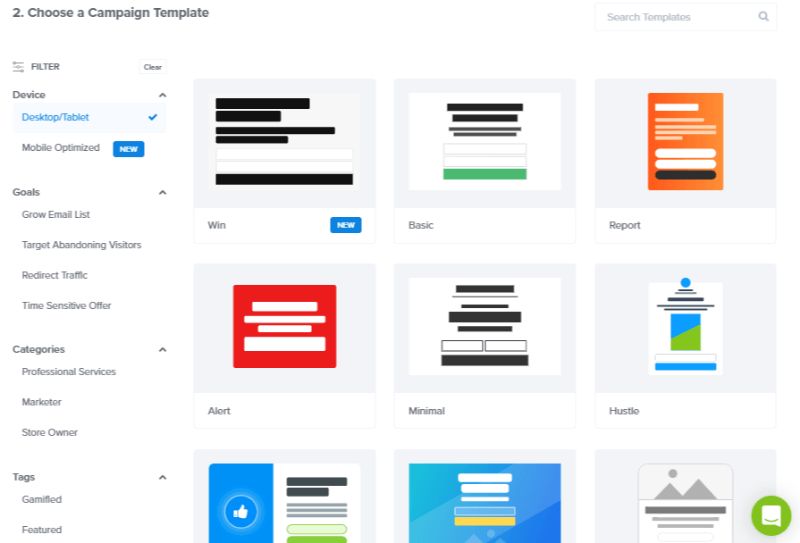
Select any template from there to use it.
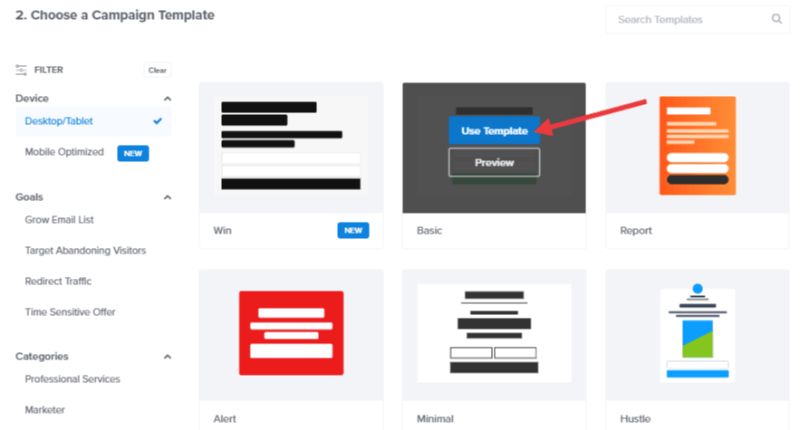
After selecting the campaign template, you need to name it. This is just for identification. Plus, choose the website you are planning to embed the optin.
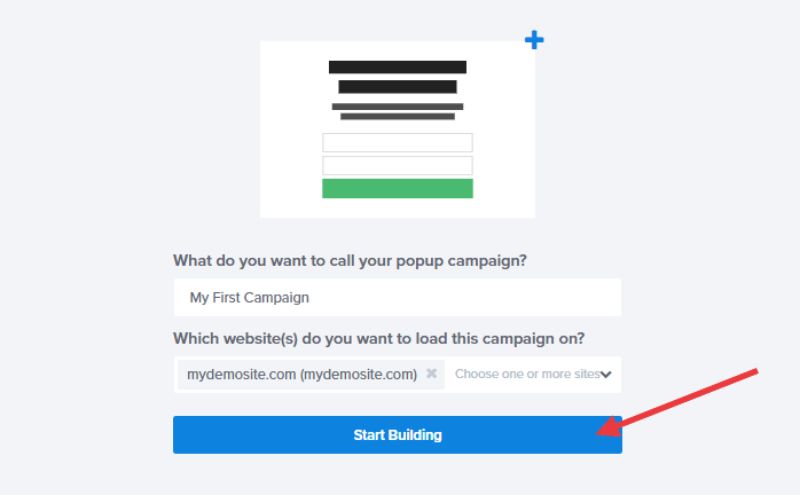
The name won’t be visible to your website visitors. This is just for identifying your optins. After naming it, click on the Start Building button. You will be redirected to the OptinMonster builder then.
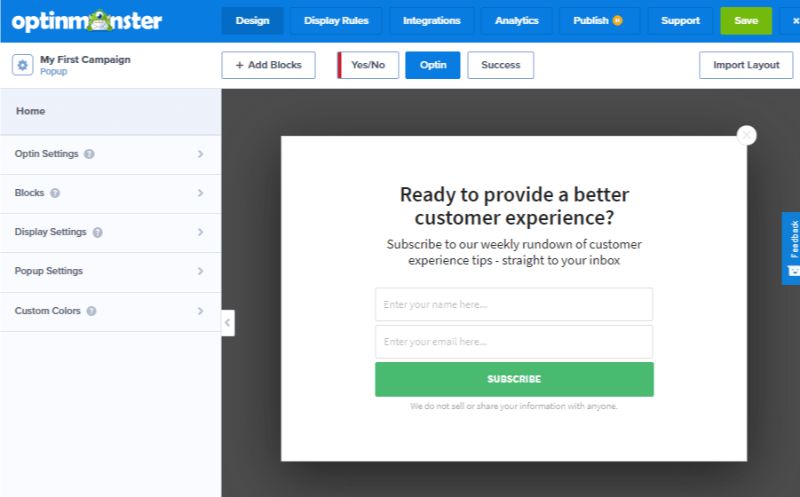
You can customize your campaign there. After making enough changes, you are good to use smart tags inside OptinMonster. For using Smart Tags, you need to add a new text element or edit an existing one. With the drag and drop builder, adding new text elements would be pretty straightforward.
In our case, we will be editing one of the text elements already available. All you need to do is, click on the element. And the OptinMonster builder will open the text element configuration on the left-hand side.
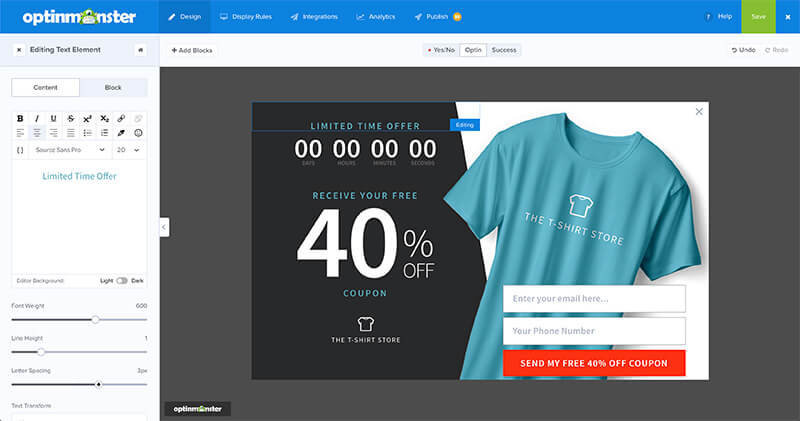
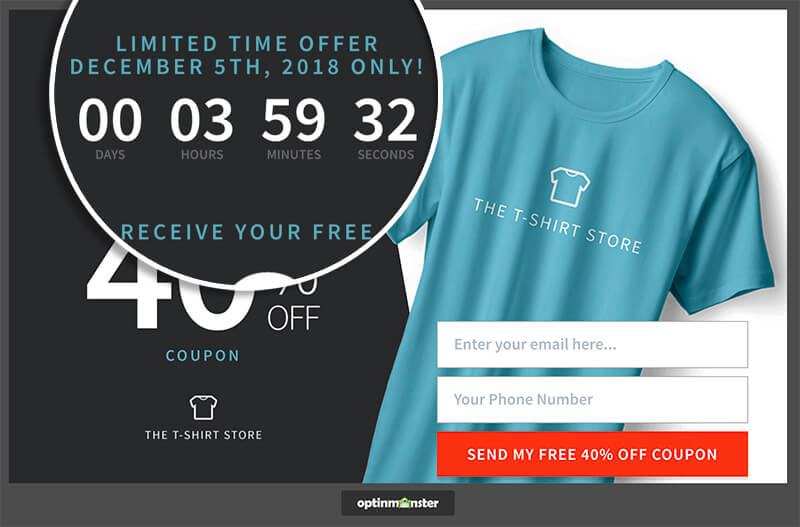
As you can see in the above screenshot, we have selected the Limited Time Offer text element. In your editor, you will see two curly brackets {}. You will need to click on it to find all the available smart tags.
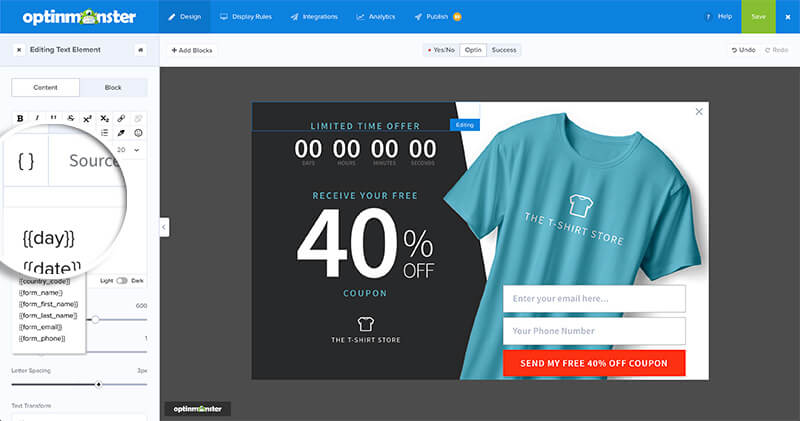
If you check the smart tags, you can see some like:
- Day
- Date
- Visitors’ Name
- Visitors’ Location
- City
- State
- Zip Code
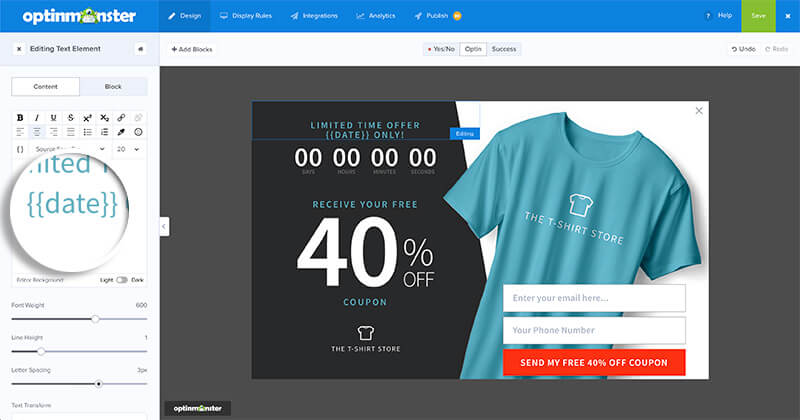
Or anything related to it. You need to select a smart tag from the list. Right after it, the tag will be added to OptinMonster builder. In this case, we have added the {{date}} tag to our optin.
You can always add a backup option to the tag. For example, if the tag can’t find the necessary information, the backup option will be displayed. Here, we will be mentioning todays’ date.
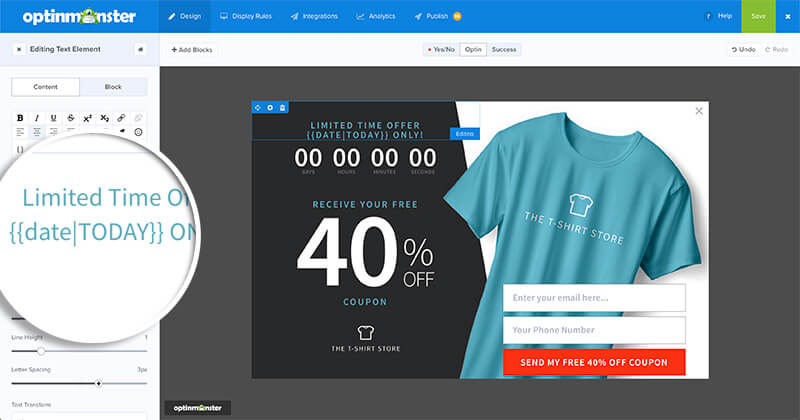
So if the tag can’t find the {{date}}, the plugin will display today’s date. This is a great idea. Once you have done customization, save your campaign and publish it. Using the OptinMonster API plugin, you can turn this campaign live on your WordPress site. If you check the optin from the frontend, you will see the live-action.
This is how you can use smart tags inside OptinMonster and add personalization. As you can see above, we do not need to write a single line of code for creating optins and modifying it.
OptinMonster got that covered.
If you do not see your optin in the frontend, that might be due to caching system. You need to try cleaning your website cache and browser cache, trying again. It will work.
Get Started With OptinMonster
You can get started with OptinMonster from below.
Every OptinMonster premium plan comes with a 14-day money-back guarantee. So if you think OptinMonster is not working as you expected, you are free to claim a full refund.
We hope you have found this article helpful and enjoyed the read. If you did, please consider sharing this post with your friends and fellow bloggers on social media. For more WordPress tutorials, check out our WordPress tutorials section.